Your Instamojo premium online store comes with an array of features for you to enjoy. Once you have set up your premium online store on Instamojo, you need to start adding banner images, banner text and customising your online store to attract customers to your home page.
In this quick and short guide, we will go through how you can add these elements to your store and make sure your customers have an easy browsing experience.
Let’s get our brand new Instamojo online store ready.
1. How to select themes for your premium online store
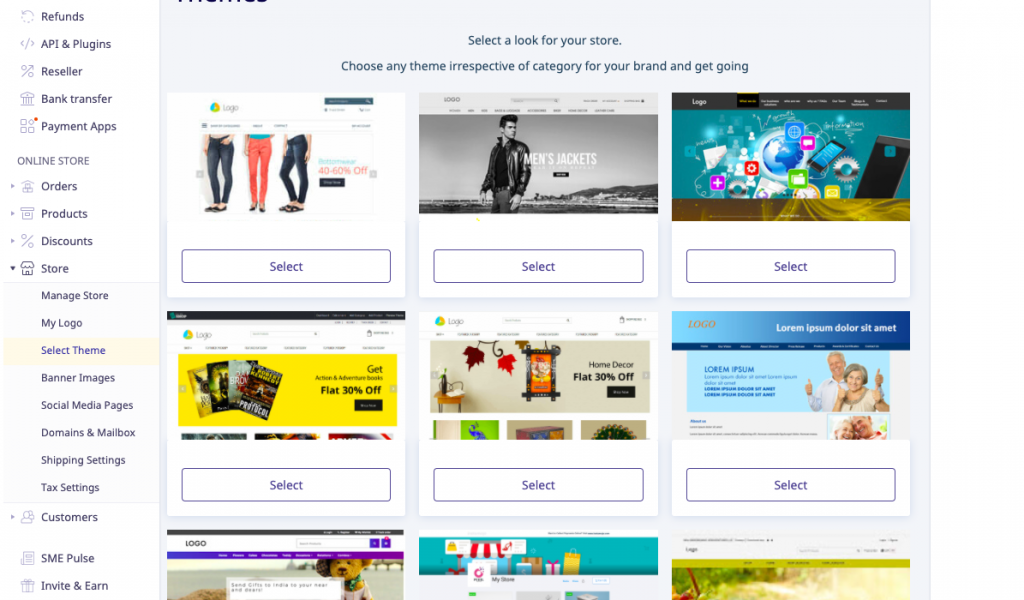
With the premium online store, you get access to over 20 plus themes to spruce up your home page.
Themes allow your e-commerce home page to look attractive to the customer. After all, it is the first page the customer lands on, therefore you need to pick the right theme for your store.
Once you upgrade your store plan, head to the dashboard, click on Online Store > Store > Select Themes
Your chosen theme will look like this on your store.
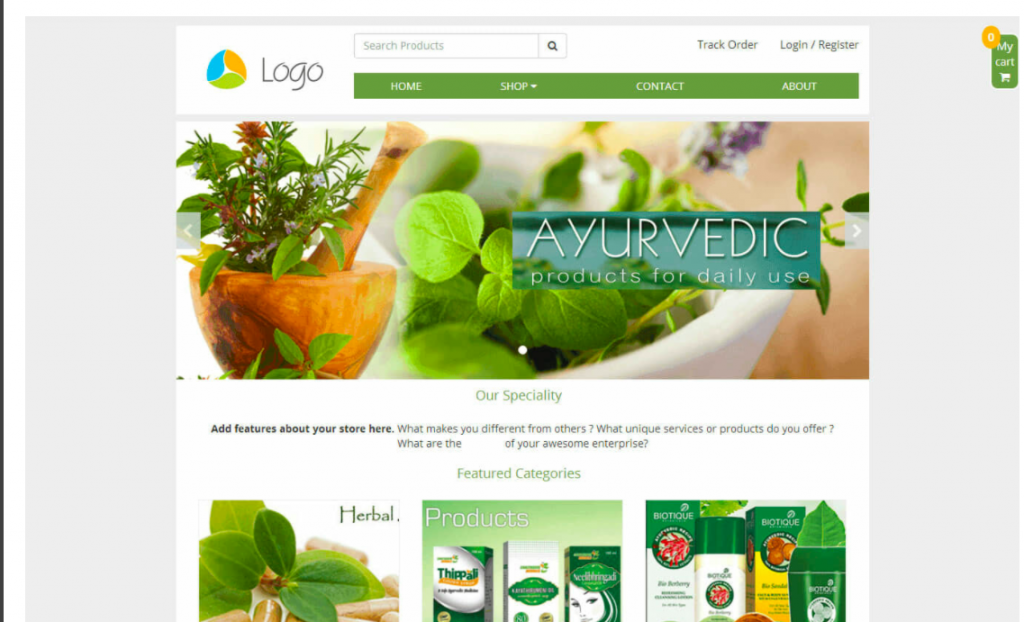
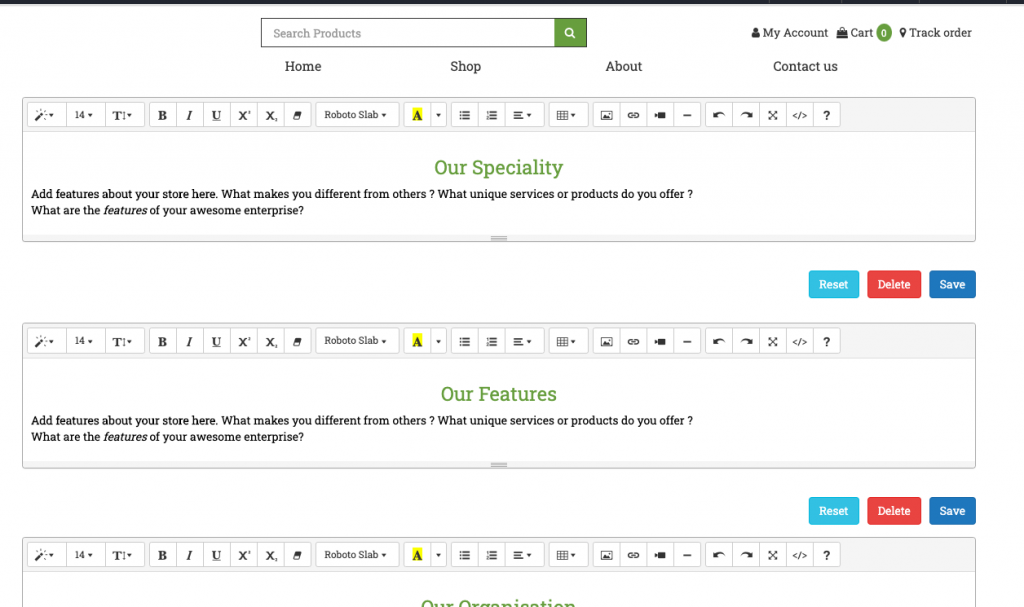
You can also edit the content on your store directly by clicking on the ‘Edit Content’ option on the top right-hand side.
2. How to add banner images and banner text to home page
Now that your theme is set, let’s click on ‘Edit themes’ below to add your banner images. If you have multiple images to go for your banner, you have the option to add them separately as image 1, image 2 here.
Remember to check ‘Slider Enabled’
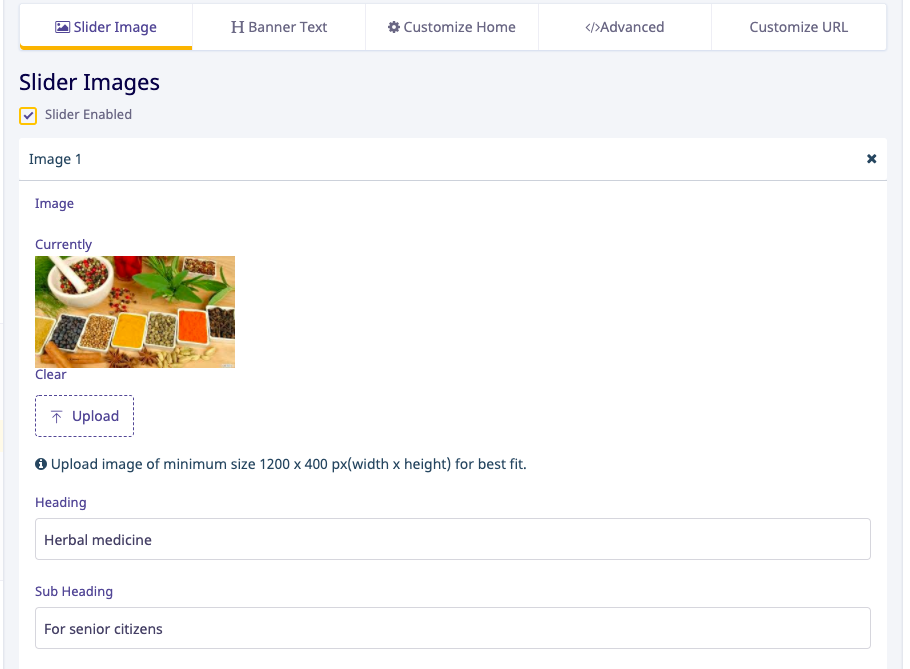
Upload image of minimum size 1200 x 400 px(width x height) for best fit
You can also add headings, subheadings and links to your banner images so that when customers click on the banner, they are redirected to the link.
Banner Text – If in case of banner images in slider mode, you wish to upload banner text, you can do so in the next option after banner images. Click here and 

3. How to customise Instamojo premium online store home page
Once your banner image and text are ready, customise your store home page. The Customise home features allow you to display: –
- Testimonials from your customers
- Latest Products and Featured Products
- Categories on your Store Home Page
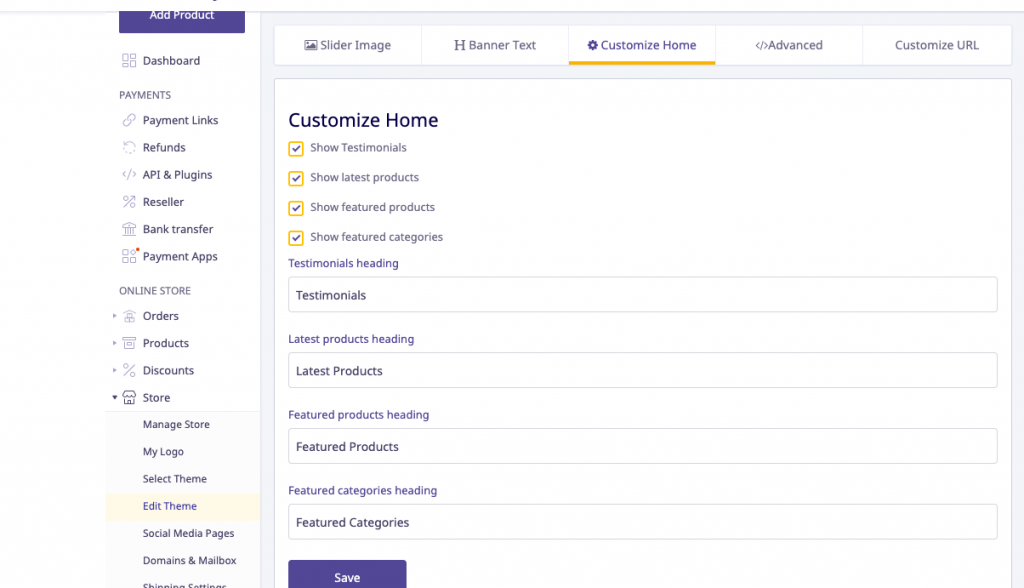
Enable these options in your Dashboard. You can also edit the headings for each option while customising your home page.
4. An introduction to your other Instamojo Premium Online Store Home Page Features
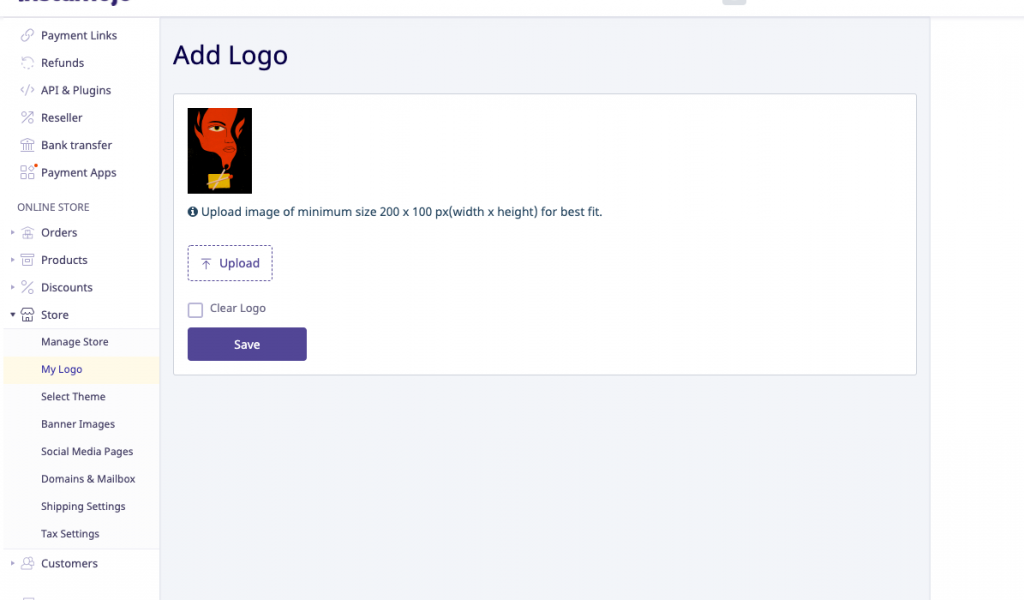
(I) Logo – Upload your brand logo with an image of minimum size 200 x 100 px(width x height) for best fit.
(II) Store Favicon – Favicons are small square images usually 16×16 pixels shown on the left side of the browser tab. It is used by web browsers to show a graphical representation of the site being visited at the left side of the browser tab.
(III) Store Info – Edit all your store content in here. Edit or reset the content to default, can be used to reset a deleted section as well. You can separately edit content for different pages on your online store. You can add images too.
(IV) Store policies – Handles all the legal terms and conditions you need to verify for your store.
(V) Store Type – Do people visit your store for enquiries, to shop or is it a landing page for an event? Specify it here in this section. Enquiry pages do not carry a checkout option.
(VI) Custom pages – Allows you to add a new customised page to your online store site. You can also allow only logged-in users to access the page. We will explore this further in our next guide.
(VII)Page Scripts – Custom CSS/HTML scripts to override existing settings. You can use this to add in chat features and integrate third-party APIs. This requires coding skills.
If you have not set up your premium online store on Instamojo, don’t worry. It takes just 2 minutes! Check out our guide here how to set up your Instamojo premium online store.
Your premium online store in Instamojo is now customised and ready for your customers to browse through. In our next guide, We will explore how you connect domains and mailbox to your online store.

